I’ve always been a little unsure about jumpsuits. My body shape is pear; in some cases that means a different size between tops and trousers. Certain styles of garments emphasise that difference in a way that I’ve never been particularly comfortable with, and I’d firmly placed jumpsuits in that category. I am working on expanding my comfort zone, but it was still with some trepidation that I agreed to the next sewing project with Kitty, a full jumpsuit by Paper Theory Patterns.
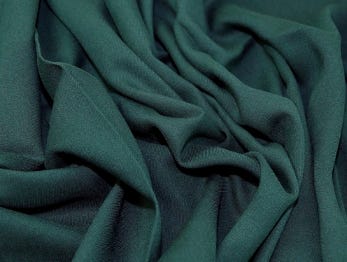
The Zadie Jumpsuit is a relaxed fit jumpsuit, with options to extend the sleeves to ¾ length or keep them at just past the shoulder. The suit did look very comfortable, and comfort feels even more of a priority in the current circumstances. Kitty suggested that we could make a working draft, one that would be made out of a cheaper fabric than the final garment but would be wearable in its own right. Paper Theory Patterns recommended medium weight fabrics with a bit of drape to them. I was impressed with Minerva’s fabric selection from our last project, so I searched their stock again and found this lovely forest green viscose twill.
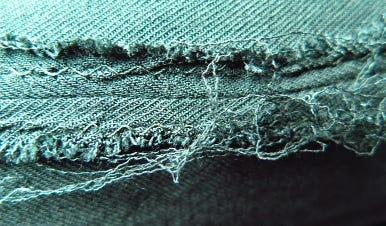
I love the colour of this fabric. It’s a deep verdant green that looks almost black in certain lights. The fabric itself is soft and feels quite silky, which did worry me a little. Slippery fabrics can be a challenge to cut and sew with; it’s easy to miscut or overwork the seam lines. I also quickly discovered that this fabric frays, a lot. If you have access to one, then I would recommend an overlocker to finish the seams on this fabric. I had to resort to the zigzag stitch finish as the 1cm seam allowances, with the addition of fraying, were too small to finish with the pressing method I’d used in the culottes project. To be fair I didn’t experience the same curling of fabric as I did with the lawn cotton, but I do worry about the durability of the seams. Time, and washing, will tell.
The pattern came with two sets of measurements: Body and Finished Garment. I was quite surprised at the difference between the two charts as the finished garment sizes were several inches larger than the body equivalents. Both myself and Kitty were a little worried about being swamped in fabric. I opted for the size 6 finished garment size; my body measurements fall between the size 10 and 12, so the finished 6 looked to still be a comfy size.
The garment assembly seemed simple in the instructions, focusing on the top first. The upper part of the jumpsuit is a wrap style, which is also how the suit is taken on and off. Neither of us was sure why the back piece was split into two, especially as the first instruction was to join these pieces together down the centre line. Our best guess that it was for aesthetics given that the bottoms would have a join in the same location. This was the first of the many seams to require finishing and, as previously mentioned, I had to use the zigzag stitch for this. While this was ok I do think an overlooker would have given a neater finish to the seams.
Each of the top pieces has a pleat, and it’s somewhere here that I took a misstep. Though I folded in the right direction, towards the side seam on each piece, I didn’t check which side of the fabric I was folding. The error was only discovered much later. As neither Kitty nor I were adding sleeves we were able to quickly finish the top section and move on to the trouser portion. Here there were more pleats and a pocket bag for the front sections. The pockets for this pattern are just the right size, with plenty of room for all the essentials!
Next came the joining of the legs and I fell into a similar pit that Kitty experienced during our culottes make. I made sure I had a back and front leg piece before sewing the first seam. The fabric started puckering as I stitched and was only becoming more pronounced the further I went. I decided to unpick and redo the seam. Minerva’s thread to fabric matching is excellent, which does make it challenging when you need to unpick the stitches without putting holes in your fabric. In the end I placed a lamp directly next to the fabric, glaring over my glasses to find each stitch. Once that was done I repined and started again. This time the fabric stayed reasonably flat, but as I approached the pocket I spotted that something was amiss. Why was the opening of my pocket visible?
When sewing together a back and front leg piece, be sure to grab the front and back of the same leg. After another round of unpicking I made sure that, yes, they were definitely a front and back piece and, yes, I was definitely matching right sides of the same leg together. Fortunately my fabric wasn’t too badly affected, but I’m not sure it could have withstood another unpicking session. Once the legs were attached to each other it was time to add the top. This is where I discovered my pleating error. Ideally the pleats on the legs should match the pleats on the top and, whilst they did on the back pieces, they didn’t on the front. Thankfully all my other seams and edges matched so I consider it enough of a win!
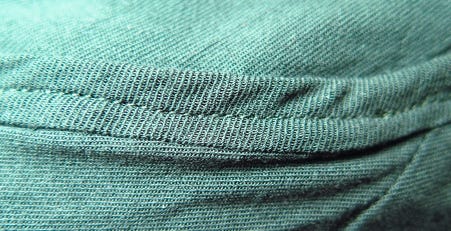
The most nerve wracking part of the project was the bias binding. There are two options, either buying a tape that matches the colour and fabric of your garment or creating the binding from the fabric itself. The Zadie pattern included instructions for the latter option, with two pieces of fabric to be cut at a diagonal to the rest of the pieces. Once joined, this strip would be long enough to cover all the open edges of the jumpsuit. The binding is made by folding the outer edges of the strip into the centre, pressing with an iron so that the fabric holds the shape. Once this is done for the length of fabric it is folded in half again so that the edges of the fabric are hidden inside.
The instructions advised pinning the binding along the raw edges and edge stitching through all the layers. Kitty said it could be tricky to capture all the layers on a single run. Instead we pinned and stitched one side of the binding first, then folded it over the raw edge and stitched again to seal all the edges in. Even with this two-step approach there were places where I missed some of the fabric and had to go back and restitch those patches. Overall I was quite happy with my first bias stitching. The folds weren’t even across the length, but it’s not overly visible when the garment is worn. The trickiest part was stitching the binding at the leg join. The finished piece curled at an odd angle, which may be due to the belt notch being on the wrong side. Another reminder to always double check which side of a garment you’re sewing. To fix this, I’ve added a couple of stitches to pull that section flat.
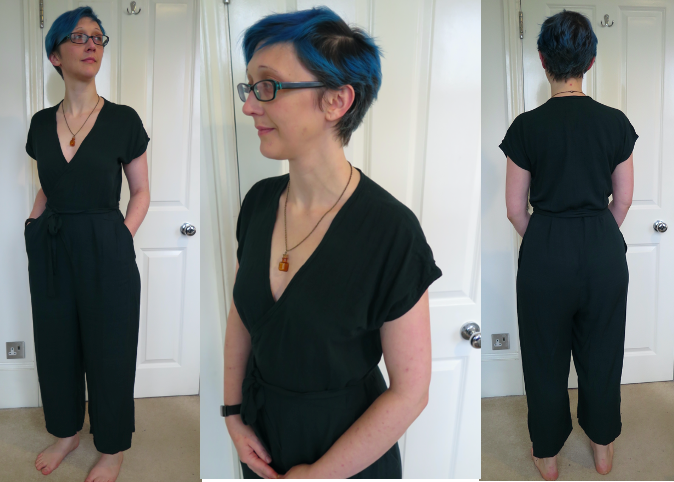
I’m reasonably happy with the end garment. It’s very comfortable to move around in and the colour was the perfect choice. Originally I had wanted to lengthen the legs from the ¾ length, but completely forgot this when cutting my pattern pieces. There is a 4cm allowance for the hem, so instead I used just 2cm to give a slightly longer finish. Though it is comfortable wear I will be leaving this project at the draft stage. The style is not quite there for me, being quite loose around the seat and not long enough in the leg. It does also tend to gape slightly when sitting down, so I have to keep a watchful eye! Perhaps we’ll try a more fitted jumpsuit with a longer leg for a future project - for now I’ll be quite happy lounging at home with the draft I’ve made!


